Pizza is a passionate issue for a lot of people. And for most people, the main issue comes down to the crust, whether it's thick or thin or chewy or crunchy or crispy. With gluten-free pizza, there's still a lot of choice, though the process is a little different, and maybe the options aren't quite as good as a traditional gluten-y pizza crust. Either way, this crust, based off of the crust from Zen Belly's cookbook, which I highly recommend, has been one of my favorite pizza crusts.
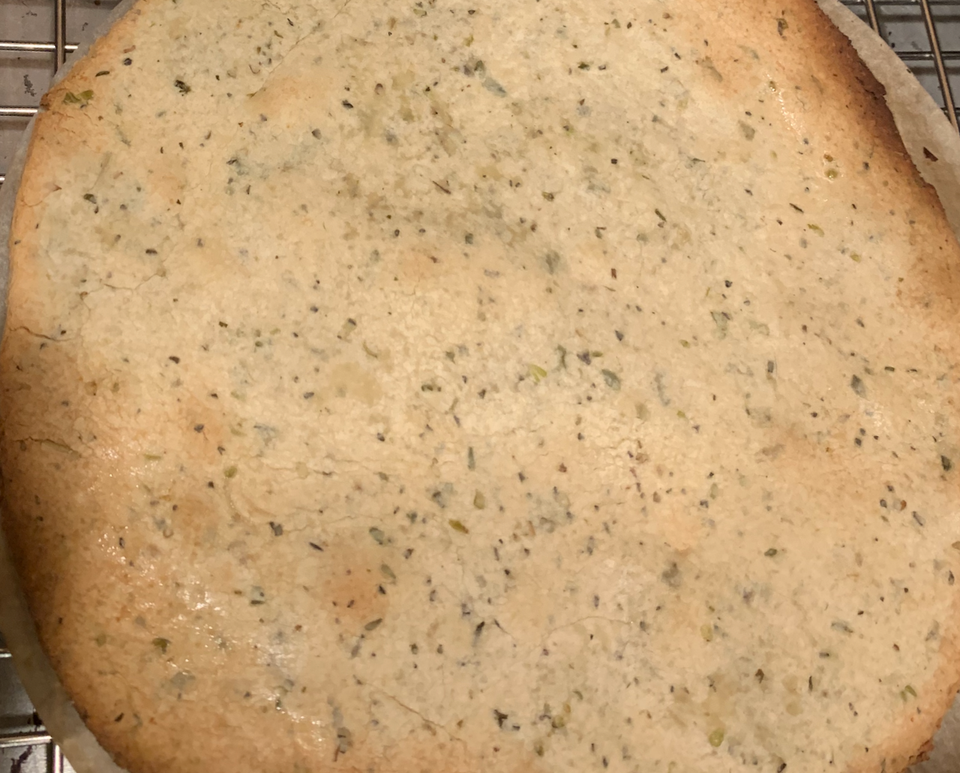
When rolled out properly, it is thin and crispy, with nice flakiness and a little bit of chew.
We make this in bulk, and in small form factors, i.e., we make a bunch of 9-inch pizza crusts. We then par-bake them and top them, vacuum seal them, to make our own frozen pizzas. We're light eaters, so it works for us. We have also made this in a larger crust, and it works just as well.
Ingredients
Ingredients are generally measured first in mass (grams) and sometimes have approximate alternate volumetric measurements. It's recommended to use the mass, if possible.
Yeast
- 10 g (1 Tbsp) Active Dry Yeast
- 15 g (1.5 Tbsp) Instant Yeast
- 30 g (1.5 Tbsp) Honey
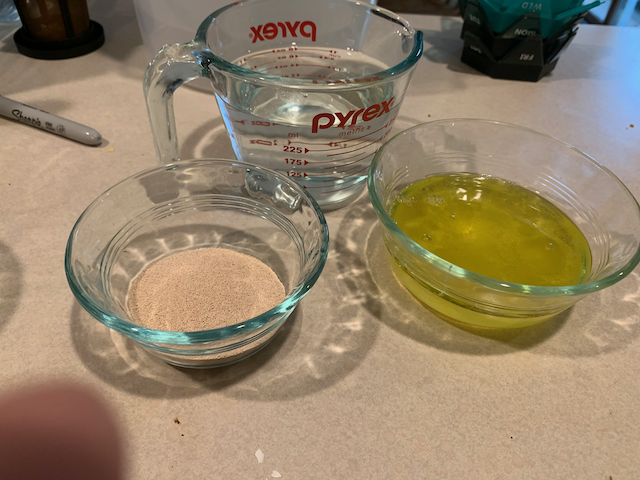
- 250 g (250 mL) Water (at approximately 110-115º F)
Wet Ingredients
- 31 g (2 Tbsp) Extra Virgin Olive Oil (Kasandrinos, or something locally bottled, use something flavored, if preferred)
- 72 g (approximately 2 large eggs) Egg Whites, room temperature (I use from an organic, local farm)
- 15 g (1 Tbsp) Apple Cider Vinegar (Kevala)
Dry Ingredients
- 370 g Almond Flour (Super-Fine) (Nuts.com)
- 509 g Tapioca Flour/Starch (Nuts.com/Bob's Red Mill/Anthony's are all good)
- 10 g Fine Sea Salt (Redmond)
- 2 g (1/4 tsp) Xanthan Gum (Bob's Red Mill)
Seasonings
These ingredients are all optional, and are all used for flavoring the crust. If you want a plainer, more universal crust, don't use them. If you want a different flavor profile, use something else.
- 10 g Garlic Powder (Penzeys)
- 5 g Dried Oregano (Penzeys)
- 5g Dried Basil (Penzeys)
Materials
- Stand Mixer with dough hook
- Oven with bread proof setting (optional, but nice) and convection option (optional, but nice)
- Baking steel or stone, rated for 500º F
- Pizza Peel
- Cooling rack
- Parchment paper rounds (8-inch or other preferred size)
- Rolling pin
- Digital Scale/Balance with grams and 1g precision or better
- Adjustable ring mold (or egg mold) or paring knife for trimming
Directions
-
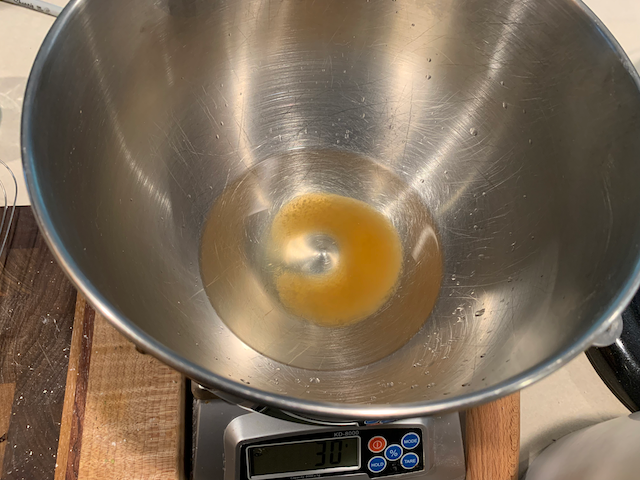
In the bowl of a stand mixer, put 250 g of water at 110º F.

-
Add honey.
-
Add yeasts.

-
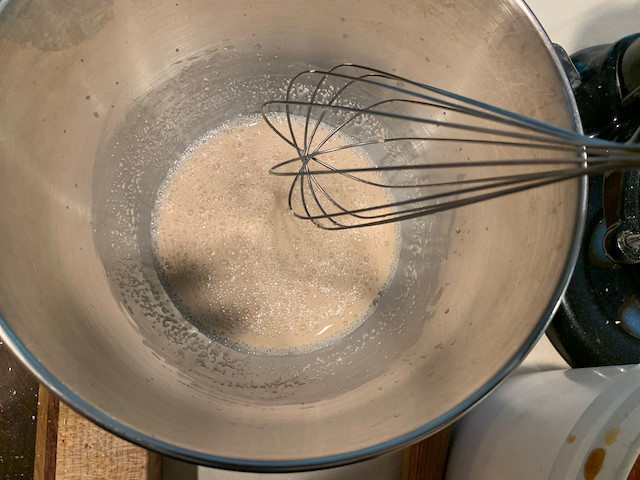
Mix with a whisk.
-
Let stand for 15-20 minutes until super frothy.
-
While yeast mixture is growing, prepare other ingredients.
-
In a small bowl, combine egg whites, olive oil, and apple cider vinegar.
-
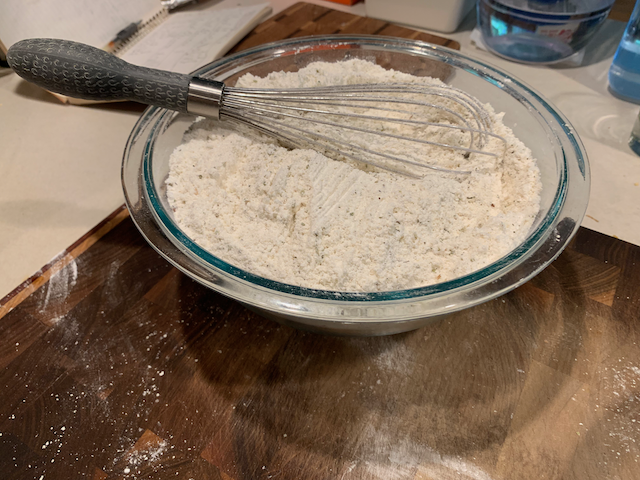
In a large bowl, combine almond flour, tapioca starch, sea salt, xanthan gum, and any seasonings used, and mix them well with a whisk.
-
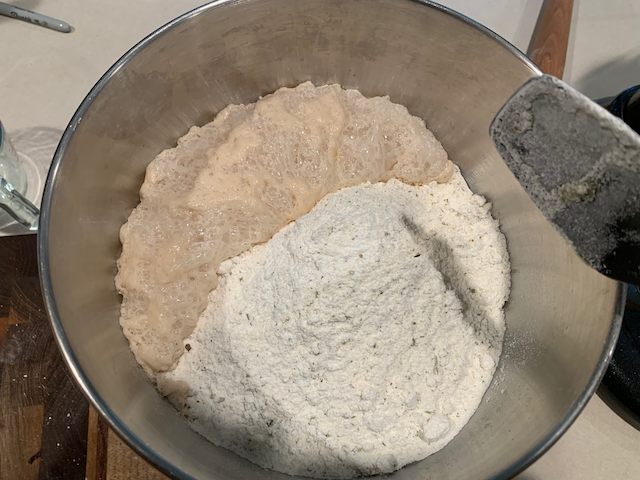
When yeast mixture is ready, combine wet ingredients and dry ingredients into yeast mixture. Lightly mix with a spatula.
-
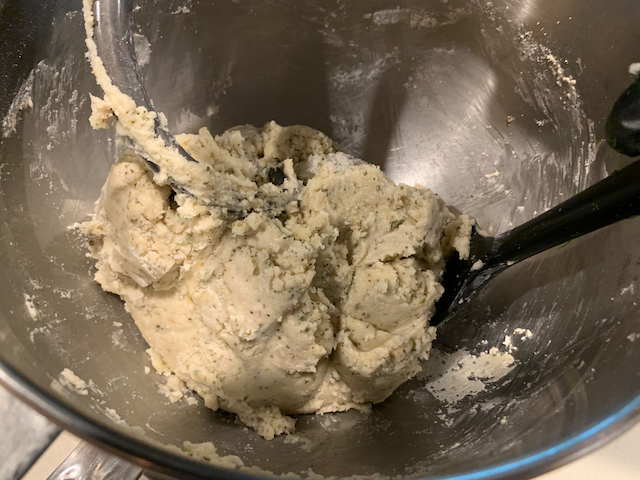
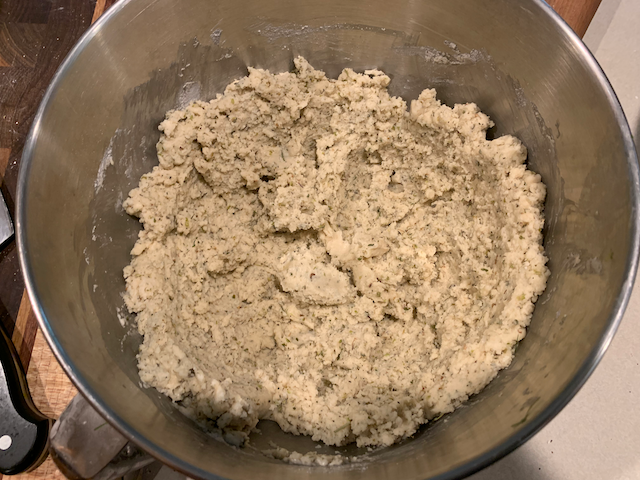
Affix bowl to stand mixer and equip with dough hook. Mix on low speed for 3-4 minutes. If the dough rides up the side of the bowl, stop the stand mixer and scrape down the sides of the bowl with the spatula.
-
Continue mixing on low for another 3-4 minutes. The dough may form a ball or it may not, but it will be firm enough to knead into a ball.
-
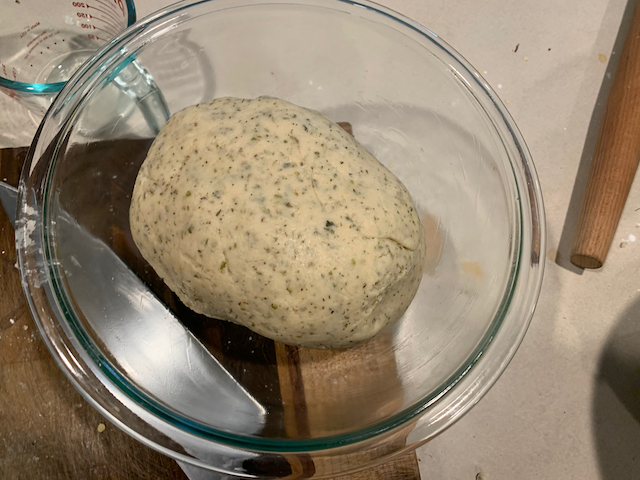
Stop the mixer and remove the dough from the bowl. Form into a ball. Place into an oiled bowl.
-
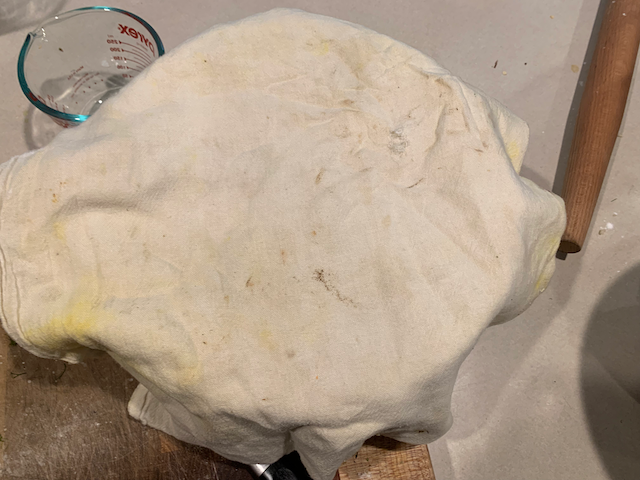
Cover with a clean towel, and place into a warm location. I use my oven on the bread proof setting. Something around 95º F will be more than sufficient.
-
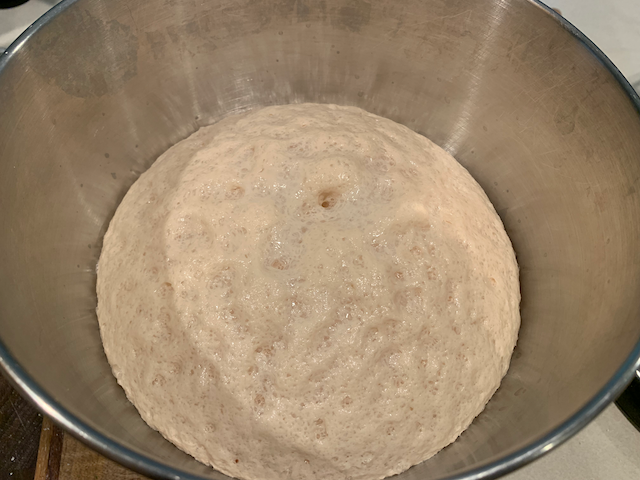
Let rest for 3-6 hours.
-
After resting, remove the bowl from the resting place. The dough should have doubled in size.
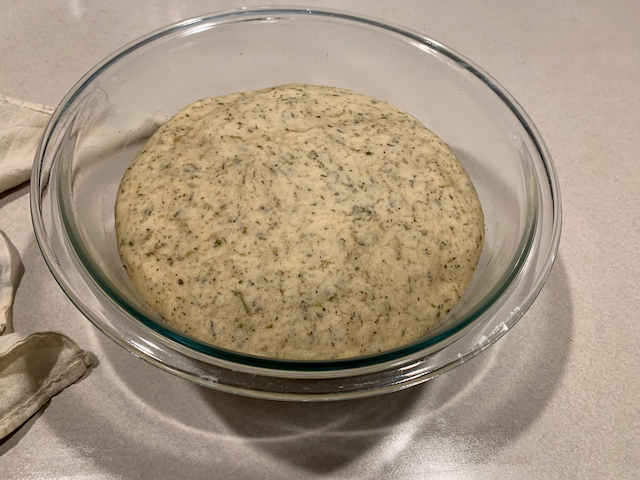
-
It will be dry and crumbly on the surface, but moist on the inside, so some kneading will help restore moisture. You can add some water if you need to, but only do so by moistening your hands lightly and then kneading the dough.
-
Preheat the oven to 500º F. If you have a baking steel or stone (that's safe for 500º), it'd be ideal to place it in the oven at this point to preheat, making sure to follow the directions of the baking steel or stone.
-
Weigh the total dough. For me, it was around 1290 g. The rest of these directions are for the 9-inch crusts that I make. You'll need to adjust accordingly if making a different size.
-
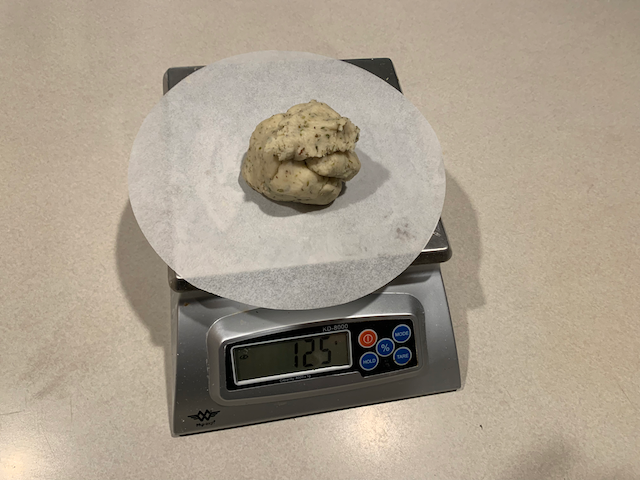
Place a piece of parchment on the scale and tare it. This parchment will stay there until the end.
-
Weigh out about 125 g of dough.
-
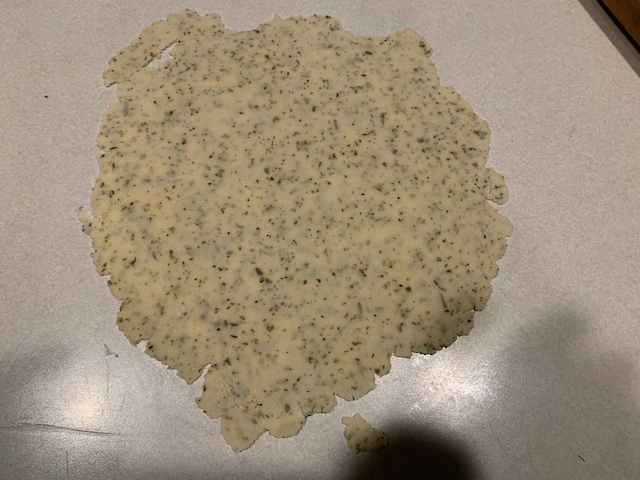
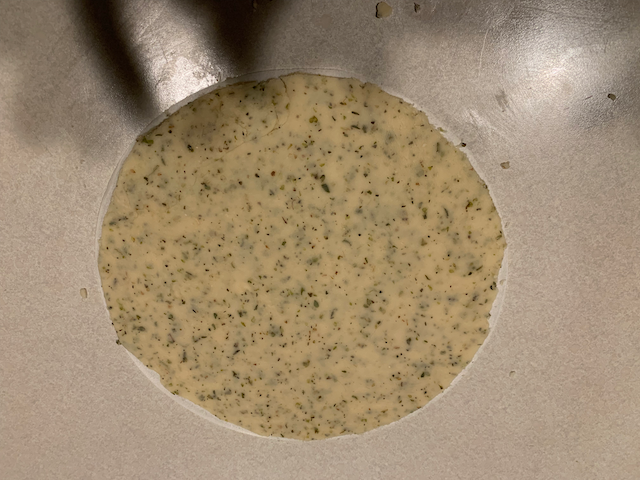
Roll the dough into a ball. Place the dough in the middle of a new parchment on the counter top.With the rolling pin, always rolling in one direction (toward you or away from you, for example), begin rolling out the dough, rotating the parchment 45º at a time or so until the crust is rolled out to about 1/16" or 1.5 mm thick. This is really thin, and it may tear occasionally. If it tears or breaks, that's okay, just press it back together and lightly roll over it again to even it out. The beauty of gluten-free crust is that there's no gluten worry about. You can keep it thicker or go thinner if you like, this is just my preference and produces a nice crispy crust. Alterations may change bake time.
-
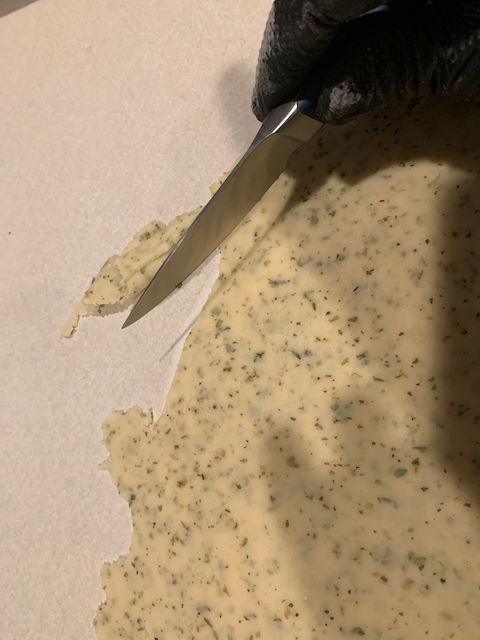
Once it's rolled out to the desired thickness, trim the dough to within 1/4" of the edge of the parchment. If you have an appropriately sized ring mold or egg mold, you can use that. I've mostly used a sharp paring knife with good success. It's just a bit tedious.
-
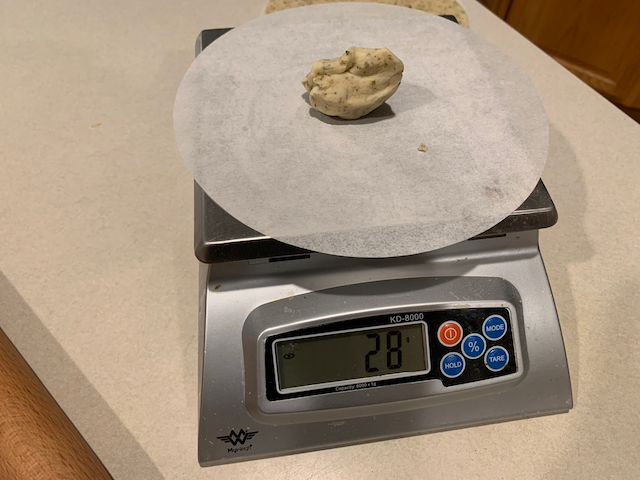
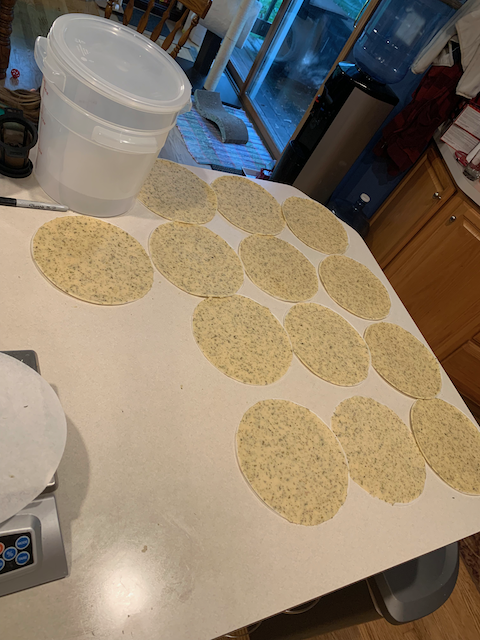
The trimmings go back to the next crust, and I'll usually end up with about 25 g of trimmings, resulting in about 100 g per crust.
-
For the 9" parchments, this results in about a 8.5" pizza crust. For me, this works well in the 10" vacuum bags once topped.
-
I usually build up a buffer of some or all of the crusts before par-baking. For the 9" parchments, I'll get 13 crusts per batch.
-
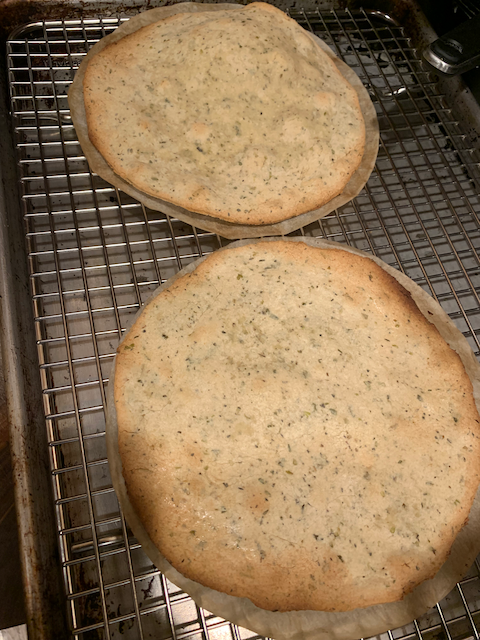
When ready to par-bake, place one or two crusts on a pizza peel and slide onto the steel in the oven. Bake for 5 minutes or until golden brown just around the edges.
-
After five minutes, use the pizza peel (with the assistance of a spatula/fish turner, if necessary) to remove the crust from the oven and place onto a cooling rack while the next crust bakes.
-
After cooling, top with desired toppings or prepare for long-term storage!
Storage
- For individual storage, wrap par-cooked crusts individually in plastic wrap after they have fully cooled. They may vacuum seal okay, but we've not tried to do so yet.
- These freeze incredibly well already topped with sauce and toppings. To do so, allow them to cool, then top them. Slide them into the vacuum bag, but do not seal them yet. Freeze over night. Once frozen, then vacuum seal.
Updates
- 2022/10/09: Corrected some typos.
- 2022/12/04: Adjusted post for 8 inch crust that I actually made.
